Advanced Serial Port Monitor
We’ve reached number 4 in our ranking: Advanced Serial Port Monitor. It's a very comprehensive software, but unfortunately, it's costly and not multiplatform. This software is purely dedicated to the serial port and cannot be used as a terminal, which is a significant drawback!
Other than that, it’s very streamlined but still allows you to set many parameters. It essentially operates in three modes: Manual, Spy, and Dual Port. Personally, I have never tried the Dual Port mode; I have always used it for the Spy functionality, which I must admit works really well, although it doesn't capture all possible signals.
Similar to SerialTool, it uses a Kernel driver for the Spy mode. I would recommend it only if you need some specific functionality that other software doesn't provide. I purchased it several years ago, and I can no longer receive updates. I don’t know or have investigated the license policy. I do know for certain that if I download the latest version, I cannot activate my license, so I carefully preserve the original copy that was licensed to me.
Let’s start with some screenshots to describe what this software offers.
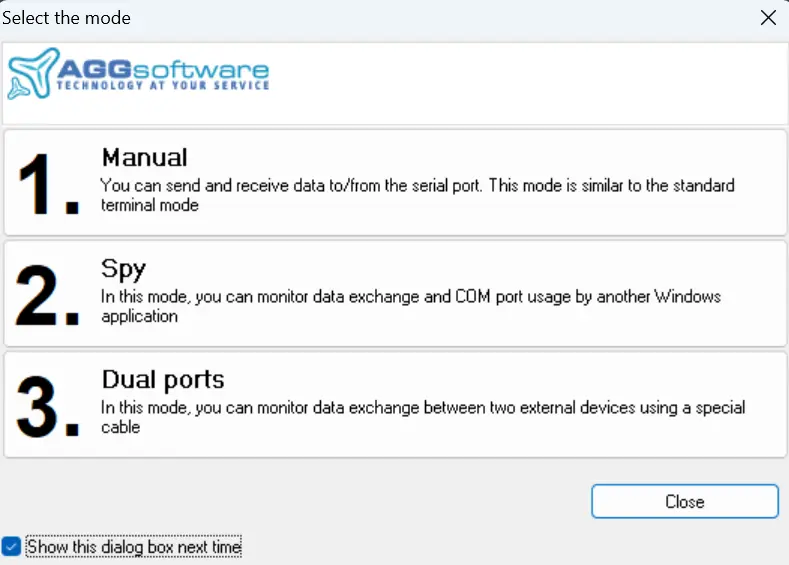
This screenshot is displaying a window where users can select the mode of operation. The interface is simple and presents three modes:
-
Manual: This mode allows you to send and receive data to/from the serial port, similar to a standard terminal mode. It's designed for direct communication and data exchange with the serial port.
-
Spy: In this mode, you can monitor data exchange and COM port usage by another Windows application. This is useful for analyzing and debugging communications without interfering with the ongoing data exchange.
-
Dual ports: This mode lets you monitor data exchange between two external devices using a special cable. Warning this is not a multiple serial handling.
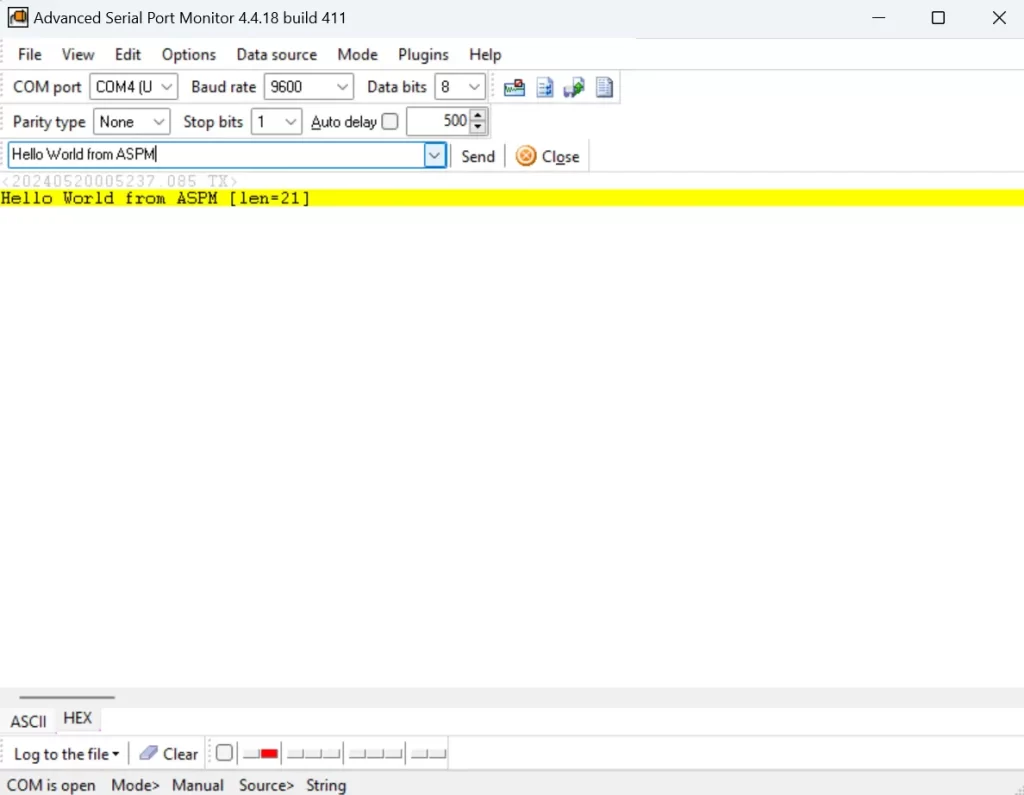
The software interface is pretty user-friendly. At the top, I have configured the COM port settings, selecting COM4, setting the baud rate to 9600, with 8 data bits, no parity, and 1 stop bit. I sent the buffer “Hello World from ASPM” from the edit line by pressing the “Send” button. There's also an option to automatically send the buffer with an auto delay, which is set to 500 milliseconds, ensuring there's a small pause between sending data packets.
The message is now displayed in the main window with a timestamp showing when it was transmitted. The software helpfully highlights the sent message in yellow and indicates the length of the message (21 characters). The yellow background of the text indicates that the string is sent, while received data is not highlighted.
Below the main window, there are toggles for ASCII and HEX modes, allowing me to switch between viewing the data in text or hexadecimal format. The log file option at the bottom lets me save the communication data for later review, which is really handy for debugging.
I also appreciate the clear indicator at the bottom showing the COM port status, the mode I'm in (Manual), and the data source (String).
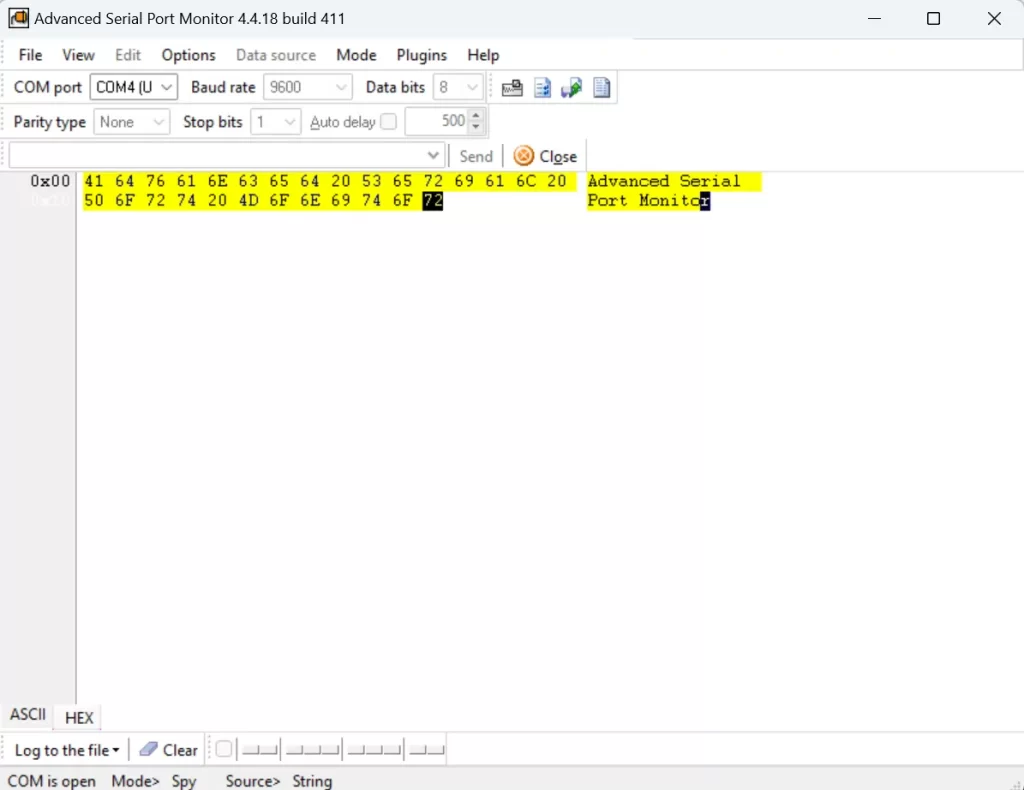
The interface also provides options to switch between ASCII and HEX modes, allowing me to view the data in either format as needed. Here is the HEX view for the buffer I sent earlier.
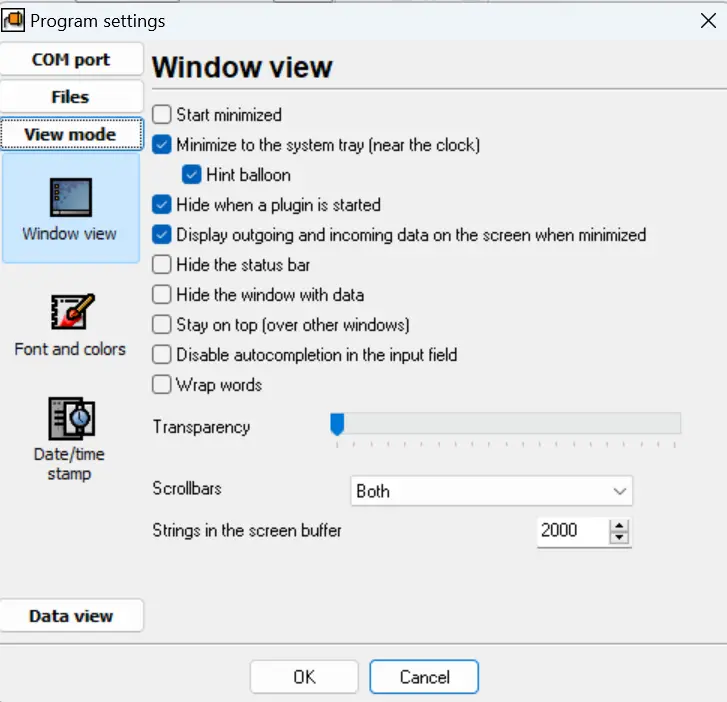
In this screenshot, I'm exploring the “Window view” settings . Here, you can customize how the software window behaves and appears. For instance, you can choose to minimize the application to the system tray and have it display a hint balloon when minimized. There's also an option to hide the window when a plugin is started, which keeps the interface uncluttered.
One of the useful features is the ability to display outgoing and incoming data on the screen even when the application is minimized, ensuring you don't miss any critical information. You can adjust the transparency of the window, making it less intrusive if you need to keep it open over other windows. Additionally, there are options to hide the status bar, disable autocomplete in the input field, and wrap words for better readability.
You can also configure scrollbars for the display window and set the number of strings to keep in the screen buffer, which is currently set to 2000.
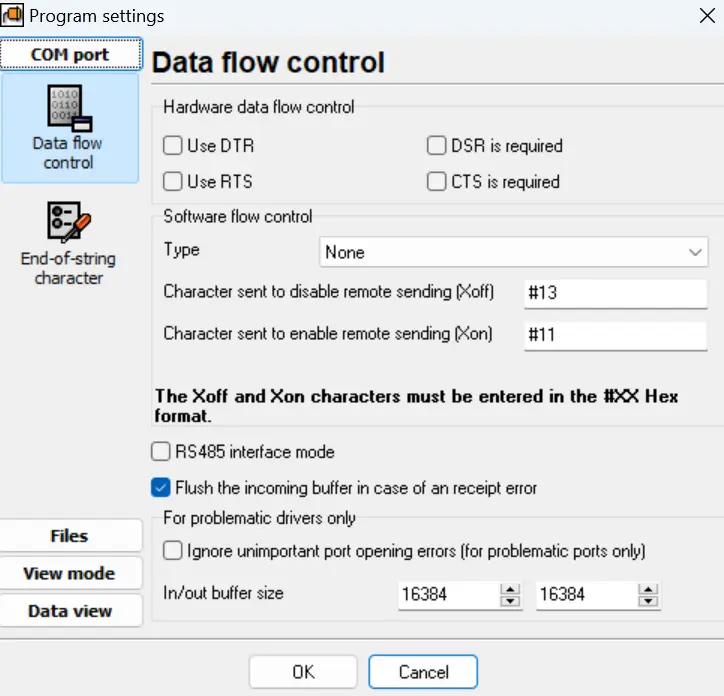
In this screenshot, I'm looking at the “Data flow control” . Here, I can configure how the software handles data flow control. There are options for both hardware and software flow control, allowing me to specify whether to use DTR (Data Terminal Ready), RTS (Request to Send), DSR (Data Set Ready), and CTS (Clear to Send) signals for managing the data flow.
For software flow control, I can choose a type and define the characters that signal when to start (Xon) and stop (Xoff) sending data. These characters need to be entered in hex format. This flexibility ensures that the communication protocol can be precisely managed according to my requirements.
Additionally, there's an option for RS485 interface mode (I am not really sure what this is exactly doing) and a setting to flush the incoming buffer if a receipt error occurs. This helps maintain data integrity and ensures that any errors are promptly handled.
There's also a section specifically for handling problematic drivers and ports. I can choose to ignore unimportant port opening errors, which is useful for dealing with finicky hardware.
Finally, I can set the buffer size for both input and output. Please consider that is depending on your hardware which allows me to manage the amount of data the application can handle at once. It cannot exceed 8192 bytes follwoing Windows specifications I do not userstand why the default value is twice the Windows allowed value (?!).
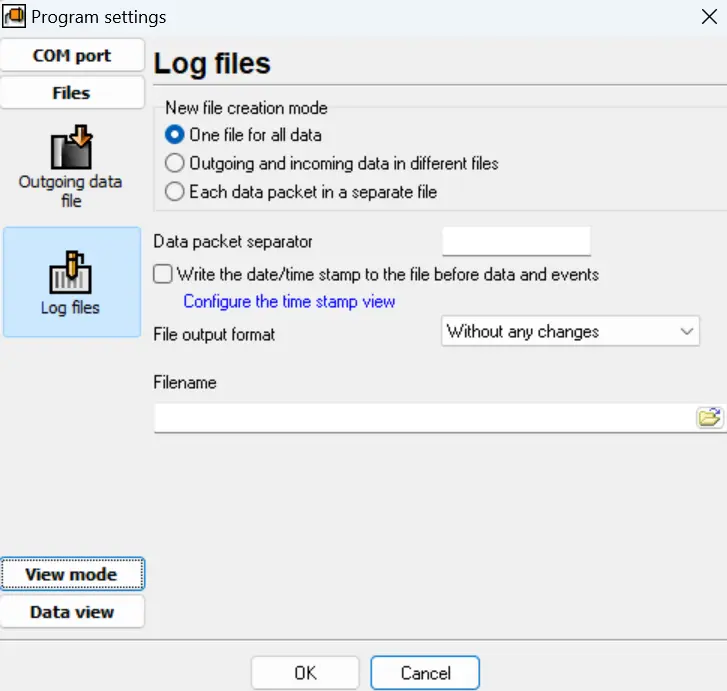
Here, you can manage how the software handles logging of data communication. There are options to create a single file for all data, separate files for outgoing and incoming data, or even individual files for each data packet. This flexibility lets you organize logs in a way that suits your needs.
Additionally, there's a setting to insert a data packet separator for clarity. You can choose to include a date and time stamp before each data event in the log file, which helps in tracking when each piece of data was sent or received. The format of the file output can be adjusted, with options to keep the data unchanged or modify it as needed. Lastly, there's a field to specify the filename for the log, making it easy to locate and review the logs later.
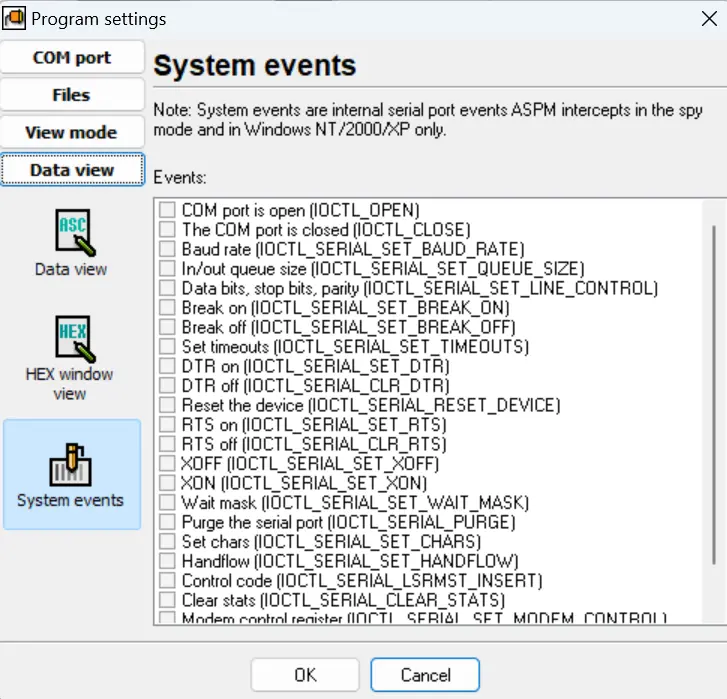
These settings allow you to select which internal serial port events ASPM will intercept in spy mode. Events include when the COM port is opened or closed, changes to baud rate, and various control signals like Port Open and Close, DTR, RTS, XOFF, and XON, among others. These options provide granular control over what the software logs, which is crucial for detailed monitoring and debugging.
It's important to note that while ASPM captures a wide range of serial port events, SerialTool supports even more events, offering more comprehensive monitoring capabilities. This is particularly valuable when you need to troubleshoot complex serial communication issues.
The use of a spy driver is crucial for these functionalities. The spy driver enables the software to intercept and log all these events at a low level, providing a deeper and more accurate view of serial port activity. This capability is a significant advantage, making the software indispensable for professionals who need to monitor and analyze serial communications thoroughly.
In conclusion:
This software is very comprehensive and stable, which are its PROs. On the CONS side, I feel that it doesn't function as a terminal at all and is dedicated solely to sending and receiving on the serial port. It is not multi-platform and is quite expensive. It also features scripting capabilities in VBA, which is quite outdated. Essentially, it's a good software, but definitely too costly for what it offers and not suitable for MacOS and Linux users.